

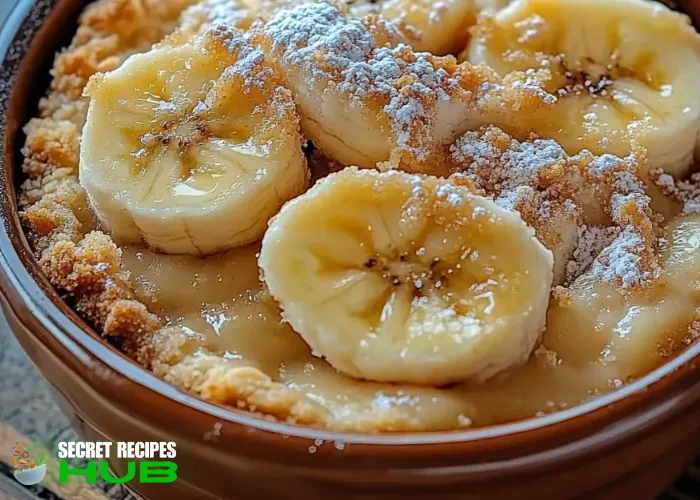
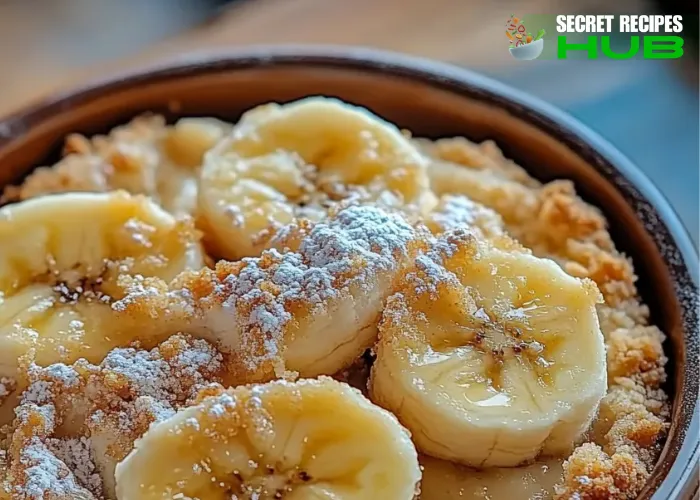
Banana Cobbler Recipe
Hi pals! You have to know — this Banana Cobbler Recipe brings back the coziest memories. Imagine a rainy afternoon, my mom humming in the kitchen, and the smell of baked bananas, brown sugar, and butter seeping into the air around us. The very first bite of warm banana cobbler with warm vanilla ice cream melting on top? Cozy comfort. This was our go-to treat whenever we had overripe bananas and wanted a sweet something without a lot of work.
Now, I make this for my husband Sultan, especially when the evenings are cold and you are itching for a dessert but don’t want to put in a lot of effort! It’s like a dessert-y cousin of banana bread — softer, juicier and with a buttery, crisp, golden topping.
Where This Recipe Comes From
Cobblers have been a food for centuries – originally a settler dessert because it could be prepared fairly simply with whatever was available. Most people tend to picture a peach or berry cobbler, but I am urging you – once you try bananas in a cobbler? Huge difference. I was inspired by a Southern cobbler I had while on a road trip in Georgia, then put my own spin on it at home using pantry staples and overripe bananas.
Why I Keep Coming Back to This Simple Banana Cobbler Recipe
You know how some desserts can be wonderful, but a bit fussy? This one isn’t. The beauty of this Banana Cobbler Recipe is that it is simple, easy, requires only 10 minutes of prep, and is comforting, warm, and delicious. No special ingredients. No mixer. Just one bowl, a dish to bake it in, and it’s still a bit special – even more special if you have a scoop of ice cream to go with it or drizzle some caramel sauce over it.
What Makes This Banana Cobbler Recipe Special
Here’s the magic: the bananas caramelize in the oven under a soft, cake-like topping. The batter bubbles up around the fruit and produces this golden crust that is slightly crispy on top but tender underneath. That contrast—gooey fruit and fluffy topping—makes each bite just so satisfying.
Plus, this cobbler is just as good for brunch as it is for dessert (yes, I ate it for breakfast with Greek yogurt on one occasion and felt NO guilt).
Equipment You’ll Need
- 8×8 or 9×9-inch baking dish
- Mixing bowl
- Whisk or fork
- Measuring cups and spoons
- Spatula
Optional but awesome: Ice cream scoop, if you’re going all-in!
Secret Tips to Make It Perfect
- Use super ripe bananas — the kind with brown spots all over. The riper, the sweeter and more caramel-y they get when baked.
- Warm your milk slightly before adding to the batter — it helps blend everything more smoothly.
- Add a pinch of salt to the topping — it balances the sweetness beautifully.
- Let it rest for 5–10 minutes after baking before diving in. That’s when it sets up perfectly.
Avoid These Common Mistakes
- Don’t slice the bananas too thin — you want chunky slices so they don’t melt away completely.
- Avoid overmixing the batter — stir just until it comes together, or you’ll end up with a tough topping.
- Don’t overbake it — once the top is golden and a toothpick comes out clean, pull it out. It’ll continue to cook a bit as it cools.
Swaps & Customizations You Can Try
Want to get creative with your banana cobbler?
- Add chopped walnuts or pecans for crunch
- Mix in a handful of chocolate chips or white chocolate chips
- Use coconut milk instead of regular milk for a dairy-free twist
- Sprinkle cinnamon sugar or a pinch of nutmeg into the topping for extra warmth
- Top it with a brown sugar streusel if you’re feeling extra indulgent
And hey, if you’re missing something, try my Ingredient Substitution Finder to see what else you can use.
FAQs
Can I make this banana cobbler ahead of time?
Yes! Bake it, let it cool, and refrigerate. Reheat in the oven at 350°F for 10–15 minutes until warm.
Can I use frozen bananas?
Yep — just thaw and drain any excess liquid first. They work great!
What if I want a more “cakey” cobbler topping?
Use self-rising flour or add a little more baking powder to make it puffier.
Can I make this gluten-free?
Absolutely. Swap the flour for a 1:1 gluten-free baking blend. It turns out just as good!
Conclusion
If you’ve never tried a banana cobbler recipe, this is your sign! It’s one of those old-school desserts that always hits the spot, whether you’re feeding a crowd or just treating yourself on a quiet night. I hope you’ll try it, tweak it to your taste, and fall in love with it like I did.
And if you’re curious about more banana goodness, check out my Banana Bread Muffins Recipe — another family fave! Or, if you’re in the mood for a tropical twist, my Pineapple Cobbler Recipe is an absolute must-try too.
Happy baking, my friends
Ingredients
For the fruit layer
- 4 ripe bananas, sliced thick
- 1/4 cup brown sugar
- 1 tsp cinnamon
- 1 tbsp lemon juice
- 1 tsp vanilla extract
For the cobbler topping
- 1 cup all-purpose flour
- 1/2 cup sugar
- 2 tsp baking powder
- 1/4 tsp salt
- 1 cup milk (warm)
- 1/4 cup unsalted butter (melted)
Directions
- Preheat & prep
- Step 1Preheat your oven to 350°F (175°C). Grease an 8x8-inch baking dish with butter or nonstick spray.
- Make banana base
- Step 2In a mixing bowl, toss sliced bananas with brown sugar, cinnamon, lemon juice, and vanilla. Pour into the bottom of the prepared dish.
- Mix the batter
- Step 3In another bowl, whisk together flour, sugar, baking powder, and salt. Stir in warm milk and melted butter until just combined (don’t overmix).
- Assemble the cobbler
- Step 4Pour the batter over the bananas. Do not stir. The batter will rise to the top while baking.
- Bake
- Step 5Bake uncovered for 35–40 minutes, or until the top is golden brown and a toothpick comes out clean.
- Cool & serve
- Step 6Let cool for 5–10 minutes. Serve warm with ice cream, whipped cream, or just on its own.